Get Started with the GitHub Action to Deploy Apps
Before you begin
If you have previously configured Armory CD-as-a-Service for your deployment target, you can skip to step 3.
-
Review the full set of requirements for Armory CD-as-a-Service at System Requirements.
-
If you have already prepared a deployment target for Armory CD-as-a-Service, skip this step. If you have not, complete the Get Started with Armory CD-as-a-Service tasks, which include the following:
- Register for Armory CD-as-a-Service.
- Create machine-to-machine client credentials for the Remote Network Agent (RNA), which you install on your deployment target cluster.
- Add a Kubernetes Cluster by installing the RNA.
-
Create a credential for your GitHub Action to use to connect to CD-as-a-Service. Assign the
Deployments Full Accessrole to your credential. -
Encrypt the GitHub Action service account credentials so that you can use them securely in the action. Create a secret for the Client ID and a separate secret for the Client Secret.
Use descriptive name for these two values. You use the name to reference them in the GitHub Action.
For more information, see GitHub’s Encrypted secrets guide.
Configure the GitHub Action
Configuring the GitHub Action is a multi-part process:
Get your manifest path
You need the path to the manifests you want to deploy when you create a deployment file. The value is used for the path parameter in the manifests block.
Note that the path you provide for the manifests block is relative to where the GitHub Action YAML is stored (.github/workflows). For example, if your repo looks like this:
.github/workflows
deployments
--manifests
----sample-app.yaml
Then, the value you use for path in the deployment file should be /deployments/manifests/sample-app.yaml.
Create a deployment file
The deployment file is a YAML file that defines what app you want to deploy and how Armory CD-as-a-Service should deploy it. You can use the CLI to generate a deployment file template.
Save your deployment file to a directory in your repo. You use this path later when you create the GitHub Action for the path-to-file parameter.
Configure the action
If you are new to using GitHub Actions, see Quickstart for GitHub Actions guide for information about setting up GitHub Actions.
Before you start, you need the path to the deployment file you created earlier. This value is used for the path-to-file parameter.
Note that the path you provide for the path-to-file parameter is relative to where your GitHub Action YAML is stored (.github/workflows). For example, if your repo looks like this:
.github/workflows
deployments
--deployment.yaml
Then path-to-file should be /deployments/deployment.yaml.
Save the following YAML file to your .github/workflows directory:
name: <Descriptive Name>

on:
  push: # What triggers a deployment. For example, `push`.
    branches:
      - <branchName> # What branch triggers a deployment. For example, `main`.

jobs:
  build:
    name: <Descriptive Name> # This name appears on the Actions tab in the GitHub UI.
    runs-on: ubuntu-latest
    steps:
      - name: Checkout code
        uses: actions/checkout@v2

      - name: Deployment
        uses: armory/cli-deploy-action@main
        with:
          clientId: "${{ secrets.<CLIENTID> }}" # Encrypted Client ID that you created in the CD-as-a-Service Console that has been encrypted with GitHub's encrypted secrets. Replace <CLIENTD> with the name you gave your encrypted secret.
          clientSecret:  "${{ secrets.<CLIENTSECRET> }}" # Client Secret that you created in the CD-as-a-Service Console that has been encrypted with GitHub's encrypted secrets. Replace <CLIENTSECRET> with the name you gave your encrypted secret.
          path-to-file: "/path/to/deployment.yaml" # Path to the deployment file.
Deploy
Now you can trigger a deployment based on what you defined in the action workflow, such as a push to the main branch.
When the action runs, Armory CD-as-a-Service starts your deployment, and it progresses to the first weight you set. After completing the first step, what Armory CD-as-a-Service does next depends on the steps you defined in your deployment file. Armory CD-as-a-Service either waits a set amount of time or until you provide a manual approval.
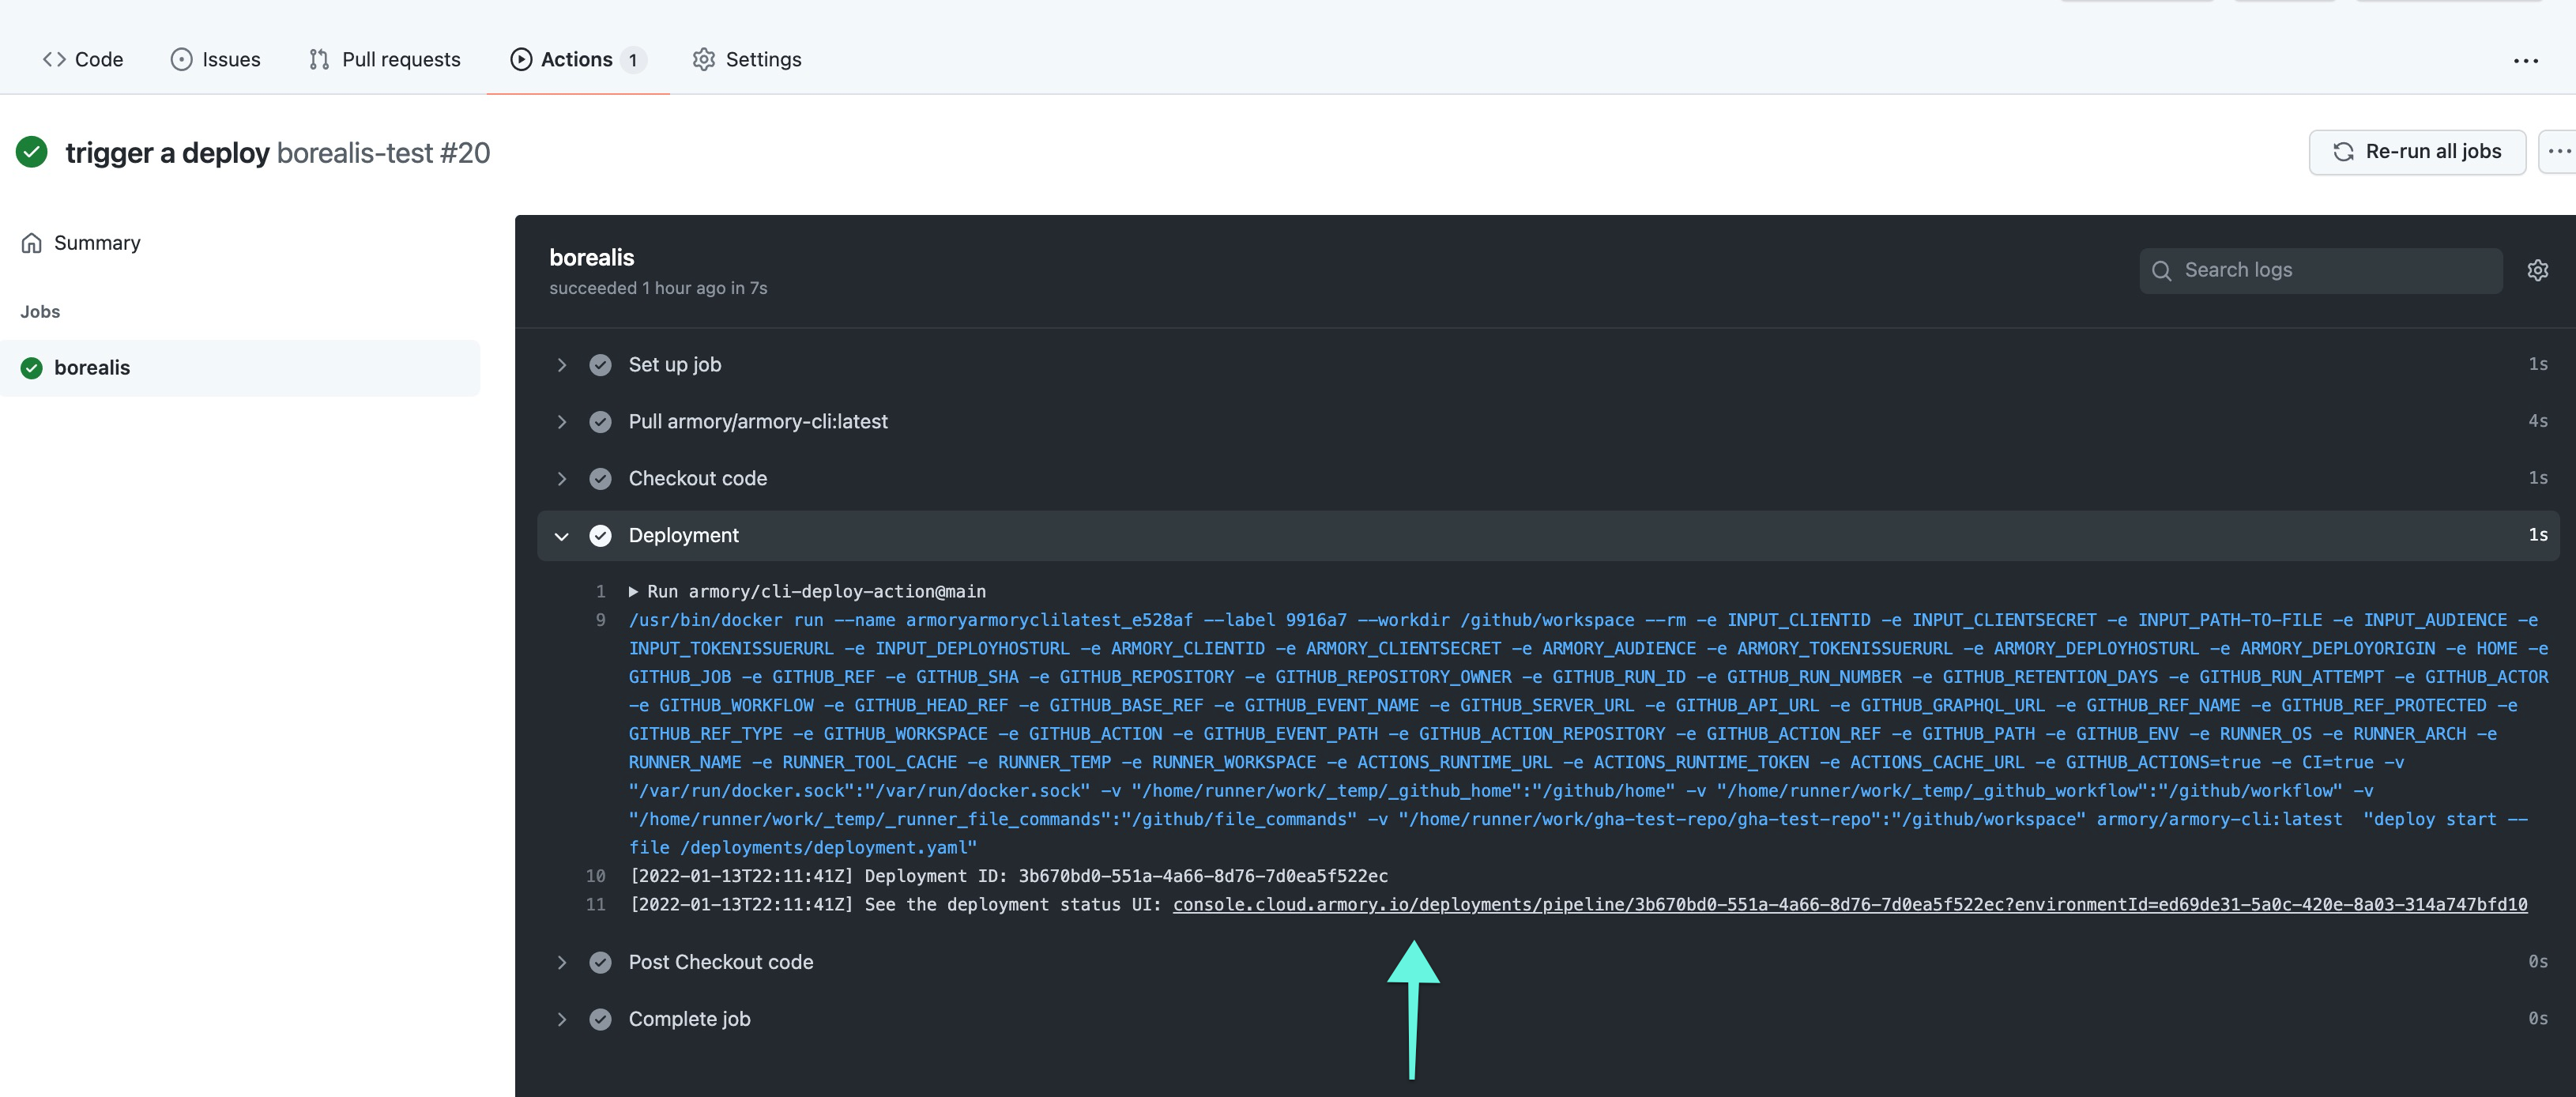
You can monitor the progress by using the Deployments UI. The GitHub Action provides both the deployment ID and a URL to the Deployments UI page for the deployment.
To see the deployment ID and the Deployments UI link, perform the following steps:
- In your repo, go to the Actions tab.
- Select the workflow run that corresponds to the deployment.
- Select the GitHub Action. This is the
nameparameter you used in thejobsblock. - In the Deployment section, you can find the Deployment ID and a link to the deployment status UI.
What’s next
Feedback
Was this page helpful?
Thank you for letting us know!
Sorry to hear that. Please tell us how we can improve.
Last modified November 9, 2022: (e11a60fd)